Wednesday, December 21, 2011

My Craft Desk Project

Here is how I turned this cluttered, uninspiring mess:
Into this:
First of all let me give a shout out to my bro Jay who made this possible. I actually stopped scrapbooking a few years ago because all of my stuff was jammed into boxes and crates and to start a project I had to drag what I needed out to the kitchen table and then drag it all back when I was done for the day even if I wasn't done with what I was working on. Talk about uninspiring.

What's cool about Jay's garage is he has so many awesome tools that made putting this table together fun (that's my opinion, may be different if you ask Jay).

A nice sturdy worktable and saw (Hi Jay!):
A biscuit machine....honestly, I had never heard of or seen one before but it makes these slits and you slide the "biscuits" along with a little wood glue to firmly adhere the wood pieces together. If you look closely you can see the little biscuits in the center of the table:
The table was so wide that we had to clamp the clamps to another set of clamps:
And then there was the power nailer! Did I say "power nailer" ???
 And one very important ingredient....
Then we must make pretty edges with the router:
With the moulding and router we get this:
And after sanding, 2 coats of primer, 2 coats of paint, 2 coats of lacquer, along with lots more sanding in between, we have the preciousssss:
Now that I have my mess sorted and stored, I realize that.......I need more stuff!!!

Black & White Gluten Free Cookies

I found this wonderful and simple recipe here: Elana's Pantry
They are really delicious and you get such a light hint of salt from the shortbread like cookie balanced by the decadent goodness of the dark chocolate. Just takes a couple to be satisfying (where I could literally eat half a bag of those white fudge covered oreo's that come around at Christmas).

The cast of characters:

Here are the baked rounds:
Cooled and dipped in glorious, melted Ghirardelli chocolate:
And set on parchment paper to set:
A couple of notes on the recipe....I put the dough in the freezer per the recipe but my cut outs were not quite firm enough to pick up without tearing so I put the rolled dough in the parchment on a cookie tray and set it in the freezer for about 15 minutes and it was much better. Or you could probably roll into a log and then put the log in the freezer and then slice the circles. I also put the finished cookies in the fridge to harden the chocolate and just kept them in there. They are just as good cold I think. Enjoy!


Black and White Cookies
2 ½ cups blanched almond flour
½ teaspoon celtic sea salt
¼ cup agave nectar
½ cup grapeseed oil
1 tablespoon vanilla extract
1 cup dark chocolate chips
  1. In a large bowl, combine almond flour and salt
  2. In a smaller bowl, combine grapeseed oil, agave and vanilla
  3. Stir wet ingredients into dry
  4. Chill dough in freezer for 30 minutes
  5. Between 2 pieces of parchment paper, roll out dough 1/4 to 1/8 inch thick
  6. Using a 2 inch cookie cutter or the top of a 2 inch wide jelly jar, cut out cookies
  7. Bake at 350° on a parchment lined baking sheet for 5-7 minutes until brown around the edges
  8. Cool for ½ hour
  9. In a small saucepan, melt chocolate over very low heat, stirring continuously
  10. Remove saucepan from heat and one by one, dip cookies into chocolate
  11. Set cookies to cool on a parchment lined baking sheet --refrigerate if necessary to harden chocolate
  12. Serve
Makes 24 cookies

Sunday, August 14, 2011

Cribbage

Me and Mr. H like to play cribbage now and then.
Good fun game. Part luck, part skill. Mr. H has green pegs and I have the red. Here is the board after the first hand. What do you notice?
 
Hard to see the red red pegs, but you can tell by the hand signals that Mr. is not happy. Another round and the lead increases.

Next hand, ooohhh let's see....
Red's increased the lead a few more lengths. Go RED! Now we come to the final hand. Who's gonna win? Oh, it's RED all the way. Oh, and did I mention skunk?
Sorry honey! Like Vince Lombardi said; "Winning isn't everything, it's the only thing. "
Vince Lombardi

Crockpot Pulled Pork

Mmmmmmmm.....pork!
Another recipe I found and tried that was really good. It's a combo of using a spice rub and slow cooking in the crockpot. Here is the link to the caveman's : ) recipe.

http://www.civilizedcavemancooking.com/2011/04/crockpot-pulled-pork.html

His recipe calls for a bone in pork shoulder but boneless pork loin was on sale at a great price. The only difference is a shorter cooking time for the boneless pork loin. I cooked it about 4-5 hours instead of the 8-10 for bone in. Here are the pretties all rubbed and ready to crock.
It takes very little water which allows a wonderful crust to form as you can see above. I also tried his BBQ sauce that is linked in his recipe. It was very good. Overall a nice warm spice that heats you up from the inside out! Wussies beware!

Here is the sauce and....
The whole shebang with the must have side of coleslaw. Woof.


Low Carb Gluten Free Rolls


I have been busy with school work so have not posted in a while. We have pretty much cut out bread from our diet but I happened upon these low carb gluten free rolls that make a pretty darn good alternative.

Here is the link to the inventor. Check out some of her other recipes.

http://blog.yourlighterside.com/2009/05/gluten-free-low-carb-buns-aka-oopsie.html

The comments also have some good suggestions from others that have made them. I didn't take a lot of pics during the prep but here is the batter plopped on the parchment lined cookie sheet. The key is very stiff egg whites.

And here they are just out of the oven.

Here is what we enjoyed them with. The pulled pork recipe is to follow. One thing I will say is they can get soggy on the bottom so I would recommend putting any sauce or condiments on top of whatever you are putting in the bun. Very simple ingredients and easy to make!

3 large eggs
pinch of cream of tartar (1/8 tsp)
3 ounces cream cheese (Do not soften)

Preheat oven to 300 degrees F.

Separate the eggs and add cream cheese to the yolks. Use a mixer to combine the ingredients together. In a separate bowl, whip egg whites and cream of tartar until stiff (if you're using the same mixer, mix the whites first and then the yolk mixture). Using a spatula, gradually fold the egg yolk mixture into the white mixture, being careful not to break down the whites. Spray a cookie sheet with non-stick spray and spoon the mixture onto the sheet, making 6 mounds. Flatten each mound slightly.

Bake about 30 minutes (You want them slightly softer, not crumbly). Let cool on the sheet for a few minutes, and then remove to a rack and allow them to cool. Store in a loosely open sack and allow to rest on the counter before use (otherwise they might be too moist). Can be frozen.

Notes: If you are making these to be savory (for burgers) you can add dry mustard and dill or other seasonings to the yolk mixture. If you want a more sweet roll, add a very small amount of stevia natural sweetener to the yolk mixture.

Thursday, June 2, 2011

Spice Rubbed Grilled Chicken Breasts

We usually marinate boneless skinless chicken breasts but I wanted to try a spice rub. I turned to my favorite cookbook, The New Best Recipe from Cook's Illustrated. Here's the link to the book on amazon. It's really an encyclopedia of cooking and it hasn't steered me wrong yet. Great gift idea for anyone who wants to learn the how and why of cooking.
http://www.amazon.com/New-Best-Recipe-All-New/dp/0936184744/ref=sr_1_1?s=books&ie=UTF8&qid=1307064795&sr=1-1

The key is brining the chicken breasts first. I trimmed and pounded 4 boneless skinless chicken breats (this works for bone in but the cooking time is different). Dissolve 1/2 cup Diamond Kosher salt in 1 quart water and pour into a ziplock bag (you can use 1/4 cup table salt but the Diamond Kosher is best). Soak for 1 1/2 - 2 hours in fridge. Drain, rinse well under running water,  then let it drip in a colander. Pat dry with paper towels.

Next make the spice rub. The cast of characters:

Mix:
2 TBS Cumin
2 TBS Curry Powder
2 TBS Chili Powder
1 TBS Allspice
1 TBS Black Pepper
1 tsp cinnamon

Coat chicken with spice mix and rub it in good (go on, get your hands in there, just don't rub your eyes afterward!):
Here they are ready for the grill:
Heat the grill over med-high heat, then brush with a little oil, and grill for 5-6 minutes a side (depends on the thickness). Here they are in all their grill striped glory:
Add a little steamed broccoli and cauliflower on the side and heaven on a plate:
Mr. H was concerned cuz he could smell the cinnamon and thought that's what it would taste like. But I'm tellin ya, the warmth of the spices, the delicate, crispy coating, the tender, juicy inside, was amazing. Delish!

Monday, May 23, 2011

Lo Mein

Dinner tonight was Chicken Lo Mein. I diced two boneless, skinless, chicken breasts. Added some minced garlic, minced ginger and a little tamari to marinate while I chopped the rest of the goodies:
On to the Shitakes....I love saying Shitake....Shitake....Shitake....ok, enough of that. But isn't it a great word? So take a bag of dried Shitakes and put em in a small microwavable bowl. Add 1/2 cup hot water, cover with plastic wrap, cut several steam vents with a paring knife, and microwave for 30 seconds. Let stand about 5 minutes.
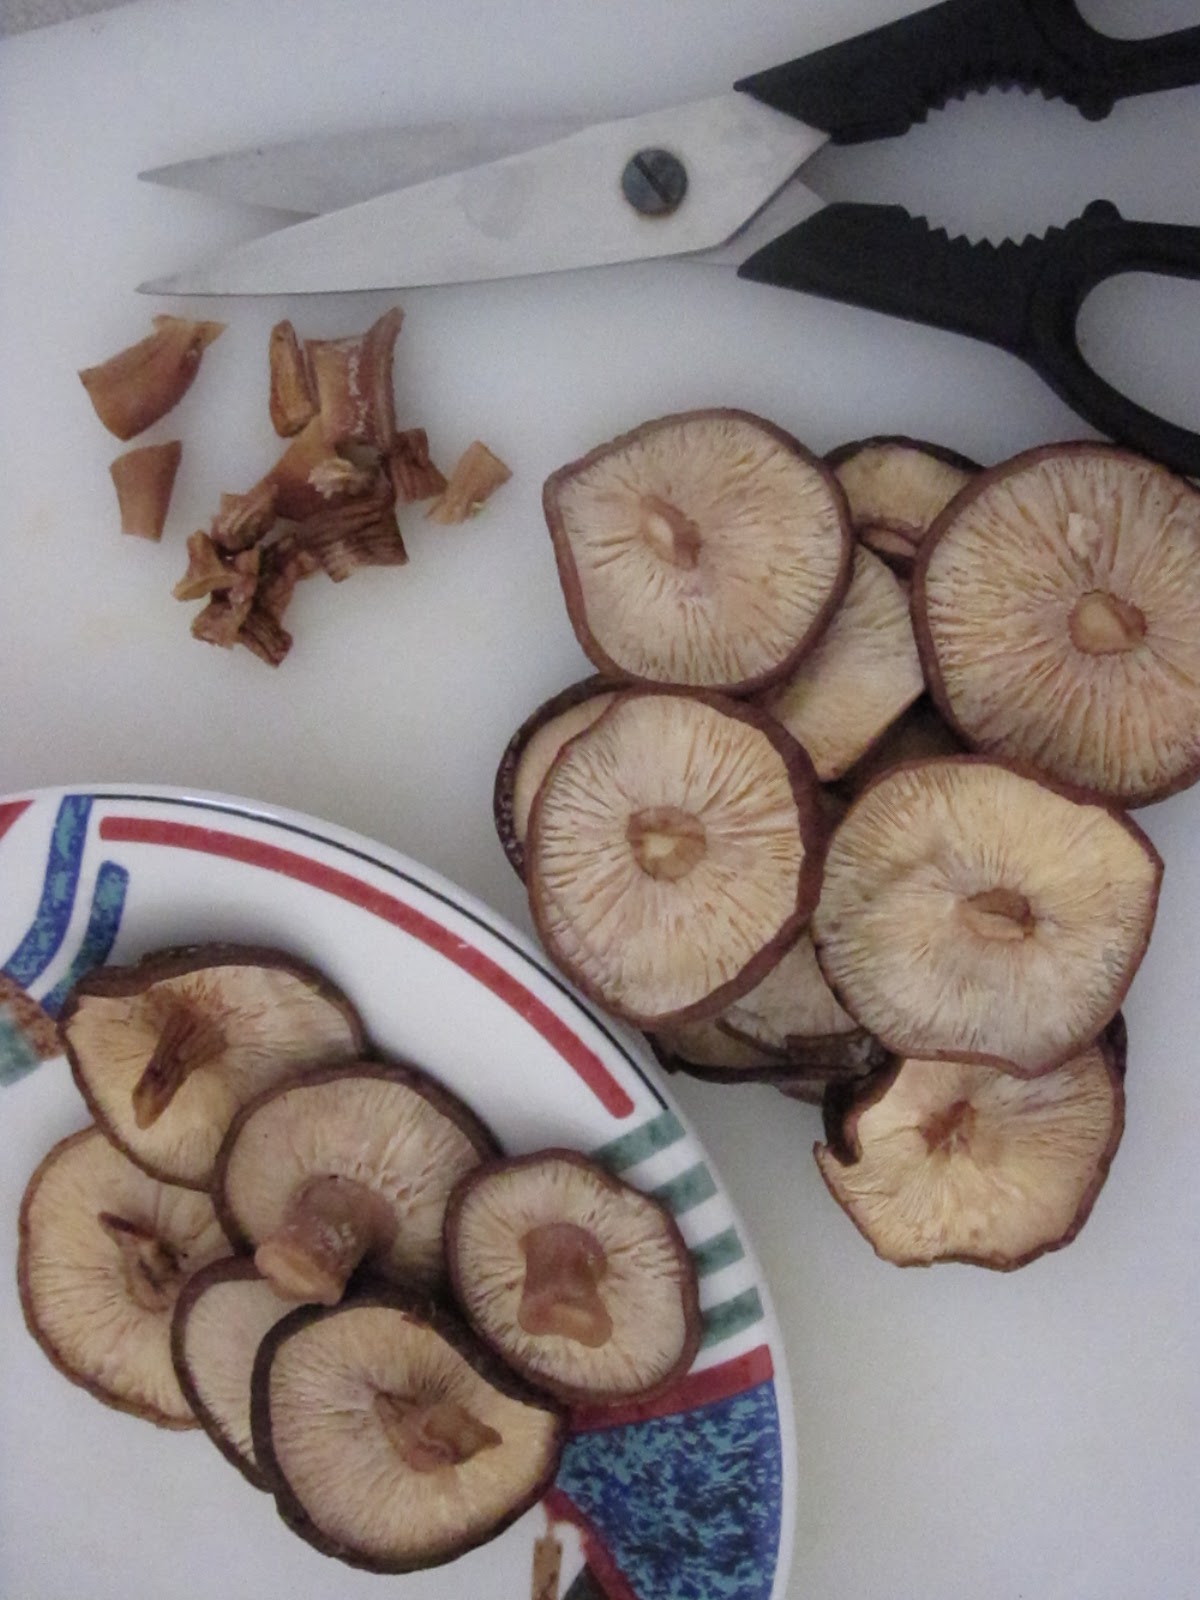
Take out the mushrooms then pour the liquid through a small strainer lined with a paper towel into a measuring cup. Set aside 1/4 cup of the liquid in a bowl and add 3 TBSP Oyster Sauce and 3 TBSP Tamari (low sodium soy is ok but Tamari is better). Trim and discard the stems (kitchen scissors work great for this part) then slice the caps into strips (the kitchen scissors work great for this as well):
This is the first time I've used Shitakes (i know, I just want to keep sayin it). Aren't they pretty? And the mushroom juice is key for the sauce. So on to the rest of the ingredients. Clockwise from the upper right...the sliced Shitakes, a bunch of bean sprouts, 3/4 head of Napa cabbage sliced, minced garlic & ginger, sliced red pepper, 4 green onions (green parts only and the scissors work great here again):
Here is where you can put the water on to boil for the noodles. We used Dreamfield's low carb spaghetti noodles. Salt the boiling water, add the noodles and cook for 7-8 minutes (box says 9 but that is too long).

While the noodles are cooking, heat a large non-stick skillet over med-high heat for 3 minutes. Add 1 TBSP oil and swirl to coat. Add the marinated chicken and saute for a few minutes.
Remove from pan. Add the mushrooms and peppers and saute for 2 minutes. Add the cabbage and saute for another minute.

Move to the side and add the green onions, ginger and garlic to the center. Add another 1/2 TBSP oil. Cook about 10 seconds then stir it all together.
Add the sprouts and mushroom liquid mixture. Toss to combine.
Drain the noodles in a colander and rinse in cold water. Put the noodles back into the hot pan, drizzle with Sesame oil and toss to coat (i like to keep the noodles separate instead of adding them all to the skillet with the sprouts and sauce). Put some noodles in a bowl and ladle the mixture on making sure you get some of the delicious sauce with it.
 This was so good. Better than any restaurant Lo Mein I've had. Enjoy!

Taco Boats

I had a little helper in the kitchen yesterday making Taco Boats and Mexi-cauli-rice. The grandman was in charge of shredding the cauliflower in the food processor. He thought it was very fun. But when I asked him if he wanted to help me with the dishes after he said, "Gram, that's not fun." I tried.

For the rice I sauteed the cauli-rice with some diced white onions and garlic. Then added some drained Ro-Tel tomatoes. Yum.

For lower carb tacos we put all the taco fixin's in a romaine lettuce leaf. Again, yum!

I browned a pound of grass fed ground beef with diced white onion, diced red pepper and garlic:

I made taco seasoning: 1 TBSP chili powder, 1 tsp cumin, 1/4 tsp onion powder, 1/4 tsp garlic powder, 1/2 tsp oregano, 1/2 tsp paprika, 1 tsp salt, 1/2 tsp pepper, and added to the meat:
Added a can of tomato sauce, and voila:
Pile the meat mixture and whatever taco toppings you like (I added shredded cheddar, sour cream, diced onion, sliced avocado (guacamole is better if you have the time), lettuce, tomatoes) and here you have taco boats with mexi-cauli-rice:
As you can see I am one of those people that piles way too much on my tacos. I'll never learn. But it was deeelish.

Tuesday, May 17, 2011

Fried Zucchini Cakes

I wanted to add another side dish to the usual cauli/mash or cauli/rice that we often have so decided to try making fried zucchini cakes. They were actually very good. Had them tonight with the fabulous chicharrones oven fried chicken. And how!

The key is to get as much moisture out of the zucchini as you can. Shred 3 zucchini's in the food processor. Put it in a colander and sprinkle some salt to draw out the water:

Let it set for a while then squeeze it through cheesecloth or paper towels. You can see how much liquid came out of one small handful:
Put it in a large bowl and add 2 beaten eggs, finely diced red onion, some chopped italian parsley, some shredded Parmesan, salt & pepper (and whatever other spices you might like), and 3 TBS coconut flour (regular flour is ok but we are trying for lower carbs and Sprouts now has coconut flour in their bins):


Mix well and form into thin patties:
Heat some olive oil in a large non-stick skillet over medium heat and brown about 5-6 minutes each side:
I cooked them in 2 batches so there was plenty of room to flip. They were really good and a nice change from the usual.